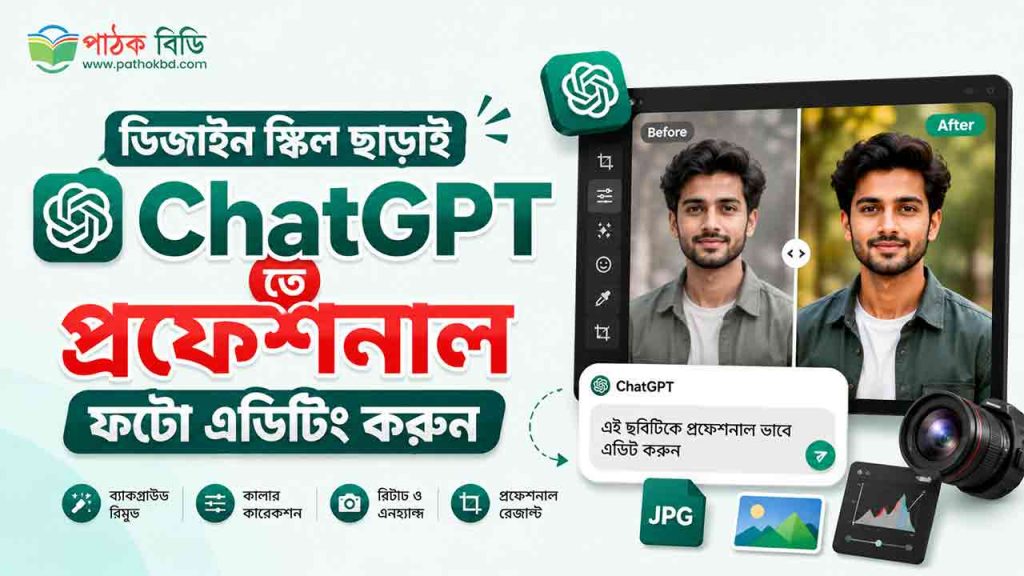


বর্তমান সময়ে কৃত্রিম বুদ্ধিমত্তা বা AI আমাদের দৈনন্দিন কাজগুলোকে কতটা সহজ করে দিয়েছে, তা আর নতুন করে বলার কিছু নেই। একসময় ফটো এডিটিং বা গ্রাফিক ডিজাইনের কাজ শেখার জন্য মাসের পর মাস কঠিন সব সফটওয়্যার (যেমন ফটোশপ বা ইলাস্ট্রেটর) নিয়ে পড়ে থাকতে হতো। কিন্তু প্রযুক্তির কল্যাণে এখন ChatGPT তে প্রফেশনাল ফটো এডিটিং করা সম্ভব, তাও আবার কোনো পূর্ব অভিজ্ঞতা বা ডিজাইন স্কিল ছাড়াই!
চ্যাটজিপিটি এখন আর শুধু টেক্সট লেখা বা প্রশ্নের উত্তর দেওয়ার মধ্যে সীমাবদ্ধ নেই। এর অ্যাডভান্সড জেনারেটিভ এআই এবং ইমেজ এডিটিং ফিচারের মাধ্যমে আপনি খুব সহজেই যেকোনো সাধারণ ছবিকে আকর্ষণীয় ও পেশাদার স্তরে নিয়ে যেতে পারেন।
এই ব্লগে আমরা এমন ১০টি পাওয়ারফুল এবং রেডিমেড ইংরেজি প্রোম্পট শেয়ার করব, যা ব্যবহার করে আপনি ম্যাজিকের মতো ChatGPT তে প্রফেশনাল ফটো এডিটিং করতে পারবেন।
চ্যাটজিপিটি (ChatGPT) দিয়ে কীভাবে ফটো এডিটিং শুরু করবেন?
ডিজাইনের মূল কাজগুলোতে যাওয়ার আগে জেনে নেওয়া যাক কীভাবে আপনি চ্যাটজিপিটি ব্যবহার করবেন:
- প্রথমে চ্যাটজিপিটি-র অফিশিয়াল ওয়েবসাইটে (https://chatgpt.com) চলে যান।
- আপনার জিমেইল (Gmail) অ্যাকাউন্ট দিয়ে লগইন করুন।
- চ্যাটবক্সের আপলোড (Upload) আইকনে ক্লিক করে আপনার কাঙ্ক্ষিত ছবিটি সিলেক্ট করুন।
- ছবি আপলোড করার পর, আপনার প্রয়োজন অনুযায়ী নিচে দেওয়া ১০টি উন্নত ইংরেজি প্রোম্পট কপি-পেস্ট করে কমান্ড দিন।
ChatGPT-র সেরা ১০টি ফটো এডিটিং প্রোম্পট (Prompts)
আপনার কাজের সুবিধার্থে নিচে নিখুঁতভাবে ১০টি এডিটিং ফরম্যাট এবং তাদের প্রোম্পটগুলো দেওয়া হলো:
১. Remove Background (ব্যাকগ্রাউন্ড রিমুভ করা)
ছবির মূল সাবজেক্ট বা মানুষকে ঠিক রেখে পেছনের ব্যাকগ্রাউন্ডটি একদম পরিষ্কারভাবে মুছে ফেলার জন্য এই প্রোম্পটটি ব্যবহার করুন। এটি চুল বা কাপড়ের সূক্ষ্ম অংশও নিখুঁতভাবে কাটতে পারে।
Prompt: Isolate the main subject in this image. Remove the entire background completely and replace it with a clean, transparent background (or pure solid white if transparency is not supported). Please preserve all fine details of the subject, including hair, clothing textures, and edges, ensuring the cutout is sharp, smooth, and professional without any fringing.
২. Enhance Image Quality (ছবির কোয়ালিটি বাড়ানো)
স্মার্টফোনে তোলা ঝাপসা, অস্পষ্ট বা কম আলোর ছবিকে আরও স্পষ্ট, শার্প এবং বাস্তবসম্মত করে তুলতে এই প্রোম্পটটি দারুণ কাজ করে।
Prompt: Perform a high-quality enhancement on this image. Increase the overall sharpness and resolution, optimize the exposure and contrast to bring out details in shadows and highlights, reduce digital noise, and perform subtle color correction. The final output must look natural, realistic, and professionally edited, avoiding an over-processed or artificial look.
৩. Change Background (ব্যাকগ্রাউন্ড পরিবর্তন করা)
আপনার ছবির পেছনের ব্যাকগ্রাউন্ডটি বদলে সম্পূর্ণ নতুন কোনো পরিবেশ যুক্ত করতে এটি ব্যবহার করুন।
(নোট: প্রোম্পটের [DESCRIBE BACKGROUND] অংশে আপনার পছন্দের ব্যাকগ্রাউন্ডটি ইংরেজিতে লিখে দিন, যেমন: a cozy modern cafe বা a futuristic city at sunset)
Prompt: Keep the main subject of this image exactly as they are. Replace the current background with a realistic [DESCRIBE BACKGROUND]. Adjust the lighting on the subject, add appropriate shadows, and adjust the depth of field (subtle background blur) to ensure the subject seamlessly and realistically blends into this new environment.
৪. Color Correction (কালার ও ব্রাইটনেস ঠিক করা)
ছবির রঙ, আলো, বৈপরীত্য (Contrast) এবং হোয়াইট ব্যালেন্স নিখুঁত করে ছবিটিকে সিনেমাটিক লুকে রূপান্তর করতে এই প্রোম্পটটি সাহায্য করবে।
Prompt: Perform professional color grading on this image. Adjust the white balance to ensure skin tones and colors are accurate, boost the contrast and vibrancy slightly to make the colors pop, and optimize the overall brightness levels. The final image should look vivid, cinematic, and highly appealing while maintaining natural tones.
৫. Remove Objects (অপ্রয়োজনীয় অবজেক্ট মুছে ফেলা)
ছবির ব্যাকগ্রাউন্ড বা যেকোনো অংশ থেকে অপ্রয়োজনীয় কোনো মানুষ বা জিনিস নিখুঁতভাবে মুছে ফেলতে এটি ব্যবহার করুন।
(নোট: প্রোম্পটের [OBJECT/PERSON] অংশে আপনি যা মুছে ফেলতে চান তা লিখে দিন, যেমন: trash can বা the person standing on the right)
Prompt: Carefully remove the [OBJECT/PERSON] from this image. Use content-aware fill to naturally and seamlessly reconstruct the empty space behind it, matching the surrounding textures, patterns, and lighting perfectly. Ensure there are absolutely no visible seams, repeating patterns, or traces of editing.
৬. Add Text to Image (ছবিতে টেক্সট যোগ করা)
পোস্টার, সোশ্যাল মিডিয়া ব্যানার বা যেকোনো ছবির ওপর সুন্দর এবং আধুনিক ফন্টে টেক্সট বসানোর জন্য এই প্রোম্পটটি কার্যকরী।
(নোট: প্রোম্পটের [YOUR TEXT] অংশে আপনার লেখাটি লিখুন এবং [SPECIFY LOCATION] অংশে পজিশনটি উল্লেখ করে দিন)
Prompt: Superimpose the text ‘[YOUR TEXT]’ onto this image. Use a clean, bold, and modern sans-serif font. Position the text professionally in the [SPECIFY LOCATION, e.g., center, bottom third] where it does not obscure the main subject. Ensure the text color contrasts well with the background for legibility and complements the overall color scheme of the design.
৭. Change Colors of Objects (নির্দিষ্ট জিনিসের রঙ পরিবর্তন)
ছবির কোনো নির্দিষ্ট অবজেক্ট (যেমন: জামা, গাড়ি, জুতো বা দেয়াল) এর আসল টেক্সচার ও আলো-ছায়া ঠিক রেখে শুধু রঙ পরিবর্তন করতে এটি ব্যবহার করুন।
Prompt: Target the [SPECIFY OBJECT] in this image and change its color to [NEW COLOR]. It is crucial to preserve all the original details, including lighting highlights, surface reflections, fabric/material textures, and folds/shadows, so the object looks like it was originally manufactured in the new color.
৮. Resize Image (ছবির সাইজ ও রেশিও পরিবর্তন)
ছবিটির কোয়ালিটি নষ্ট না করে এটিকে নির্দিষ্ট সোশ্যাল মিডিয়া সাইজে (যেমন: ফেসবুক, ইনস্টাগ্রাম বা ইউটিউব থাম্বনেইল) রূপান্তর করতে এই প্রোম্পটটি সাহায্য করবে।
(নোট: প্রোম্পটের ব্র্যাকেট অংশে আপনার কাঙ্ক্ষিত সাইজ লিখে দিন, যেমন: 16:9 aspect ratio বা 1080×1350 pixels)
Prompt: Resize and crop this image to a [DIMENSIONS/ASPECT RATIO, e.g., 16:9 aspect ratio]. Do not stretch or distort the subject. Apply intelligent cropping to maintain a balanced, professional composition, and ensure the resized output maintains maximum sharpness and high-resolution details.
৯. Add Realistic Shadow (বাস্তবধর্মী ছায়া যোগ করা)
কোনো অবজেক্ট বা মানুষকে অন্য ব্যাকগ্রাউন্ডে বসানোর পর সেটি যেন আসল মনে হয়, সে জন্য কৃত্রিম আলো-ছায়ার ভারসাম্য তৈরি করতে এই প্রোম্পটটি দারুণ।
Prompt: Create and apply a highly realistic drop shadow and contact shadow for the subject in this image. The shadows must align perfectly with the ambient light source direction in the scene. Adjust the softness, opacity, and fall-off of the shadow to match the background, ensuring the subject looks physically grounded on the surface.
১০. Transform Image Style (ছবির আর্ট স্টাইল পরিবর্তন)
আপনার তোলা সাধারণ ছবিটিকে অ্যানিমে, অয়েল পেইন্টিং, ইলাস্ট্রেশন বা থ্রিডি রেন্ডার স্টাইলে রূপান্তর করতে এটি ব্যবহার করুন।
(নোট: ব্র্যাকেটের ভেতরের অংশ থেকে যেকোনো একটি স্টাইল রেখে বাকিগুলো কেটে দিন)
Prompt: Re-imagine and render this entire image in a [CINEMATIC / ANIME / 3D RENDER / OIL PAINTING / ILLUSTRATION] style. Keep the main subject’s features, pose, and essential scene details recognizable, but completely transform the artistic medium, textures, stroke work, and color palette to match the selected style.
শেষ কথা
গ্রাফিক ডিজাইন বা ফটো এডিটিংয়ের কাজ নিয়ে এখন আর বাড়তি দুশ্চিন্তা করার বা হাজার হাজার টাকা খরচ করার কোনো প্রয়োজন নেই। ChatGPT-র এই শক্তিশালী প্রোম্পটগুলোর মাধ্যমে আপনি ঘরে বসেই চোখের পলকে প্রফেশনাল মানের কাজ লুফে নিতে পারবেন। তাহলে আর দেরি কেন? আজই আপনার একটি ছবি নিয়ে চ্যাটজিপিটিতে ট্রাই করে দেখুন এবং আপনার এডিটিং অভিজ্ঞতাকে নিয়ে যান এক নতুন উচ্চতায়!